Hugo Blog 만들기-1

Hugo를 사용해 blog를 만들어보고, 댓글 시스템연동까지 진행합니다.

Hugo Blog 만들기-1

Hugo란?

Go로 구현된 빠르고 현대적인 Static Site Generator입니다.
Visitor Request가 발생할때마다 동적으로 페이지를 생성하는 시스템과는 다르게, Content를 만들거나 업데이트할때 Build가 됩니다. 사전에 Build된 Page를 보여주기 때문에, viewer에게 최적의 경험을 제공해줄 수 있습니다.
Hosting에도 제약이 없으며, CDN에도 문제없이 동작합니다.

Hugo는 Database가 필요없고 Ruby, Python or PHP와 같은 Expensive Runtime에 Dependency가 없습니다.
특징을 정리해보면 아래와 같습니다.

  • Build가 극단적으로 빠르다. (페이지마다 1ms 이하)
  • cross platform 지원
  • liveReload지원
  • 강력한 테마
  • 어디서든 Hosting할 수 있다.

상세한 내용은 Hugo 문서를 참고해주세요.

Hugo 설치

Mac을 주력으로 사용하기 때문에, Mac 기준으로 설명하겠습니다.
타 운영체제를 사용한다면, Reference를 참고해서 설치를 진행해주세요.

Prerequisites

  • Git
    • Hugo module
      • Git submodule
  • GoLang ≥ 1.18

Go를 사용하며, Git을 통해 Submodule을 관리하기때문에 위의 2개를 사전에 설치해주어야합니다.

1
2
3
4
5
6
# Hombrew Package manager 사용
$ brew install hugo

# 정상적으로 설치되었는지 확인
$ hugo version
hugo v0.104.3+extended darwin/arm64 BuildDate=unknown

Apple Silicon을 사용중이라면, 위처럼 darwin/arm64로 나타나는지 확인해줍니다.

Github repository 2개 생성

User Github Page로 사용할 Repository와 Markdown을 기록할 Repository를 구분하기 위한 용도로 나누어 사용하기 위해서 입니다.

1개의 Repository로 통합해도 되지만, 작성해둔 content를 쉽게 copy해갈 수 있으므로 사전에 방지하기 위해 구분하여 사용하려 합니다.

저의 경우에는 아래의 2개의 respository를 생성했습니다.

  • technical-blog
  • .github.io (ex. korcasus.github.io)

Hugo로 프로젝트 만들기

Hugo를 사용해서 default project를 만들어줍니다.
생성되는 프로젝트는 아래처럼 구성됩니다.

 1
 2
 3
 4
 5
 6
 7
 8
 9
10
11
12
$ hugo new site technical-blog

$ tree
.
├── archetypes
├── config.toml
├── content
├── data
├── layouts
├── public
├── static
└── themes

자세하게 알아보고 사용하고 싶다면 Reference를 한번 읽어보는걸 권장합니다.

블로그에 이쁜 옷을 입혀줄 차례입니다.
본인이 직접 테마를 만들것이 아니라면, 공개된 테마를 사용하는게 좋습니다.
다양한 테마가 존재하므로, 문서에서 찾아보고 본인에 맞는 테마를 사용하도록 합니다.

저의 경우에는 Stack이 가장 이쁘고, 문서화가 잘 되어있다고 생각했습니다.
그래서 Stack을 기준으로 블로그 구현한 것을 설명하겠습니다.

1
2
3
4
5
$ cd technical-blog

# 다른 테마의 경우
# git submodule add https://github.com/${테마Repository}.git themes/${테마이름}
$ git submodule add https://github.com/CaiJimmy/hugo-theme-stack/ themes/hugo-theme-stack

위에처럼 Submodule로 추가해둔다면, 추후 테마 업데이트 하기가 쉬워집니다.
Hugo에 Module이라는 것도 있는데, 이 방법으로도 대체 가능합니다. 관심있다면 적용해보는것도 좋아보입니다.

테마가 정상적으로 설치되었다면, 테마의 설정파일을 사용하기 위해 기본 config file을 복사해와야 합니다.
${project}/themes/hugo-theme-stack/exampleSite/config.yaml 파일을 복사해 ${project}/config.yaml 에 옮겨줍니다.

Github Page로 사용하기위해서는 config.yaml의 일부를 변경해주어야 합니다.
아래의 예시에 주석에 해당되는 부분을 변경해주도록 합니다.

 1
 2
 3
 4
 5
 6
 7
 8
 9
10
11
12
13
14
15
# Github page로 사용할 URL로 변경해주어야합니다.
baseurl: https://korcasus.github.io/
languageCode: en-us
theme: hugo-theme-stack
paginate: 5
title: Read Write

languages:
    en:
        languageName: English
        title: Read Write
        weight: 1

disqusShortname: hugo-theme-stack
...

추가한 테마가 정상적으로 동작하는지 project 디렉토리에서 build 및 서버 실행을 해보도록 하겠습니다.

이미 어느정도 blog를 만든뒤에 작성하는거라, 완전 아래와 동일하게 나오진 않지만 비슷하게 출력되었던 것으로 기억합니다.

 1
 2
 3
 4
 5
 6
 7
 8
 9
10
11
12
13
14
15
16
17
18
19
20
21
22
23
24
$ hugo server -D

Start building sites …
hugo v0.104.3+extended darwin/arm64 BuildDate=unknown

                   | EN
-------------------+-----
  Pages            | 41
  Paginator pages  |  2
  Non-page files   |  4
  Static files     |  0
  Processed images | 18
  Aliases          | 18
  Sitemaps         |  1
  Cleaned          |  0

Built in 1494 ms
Watching for changes in /Users/user/Workspace/technical-blog/{archetypes,assets,content,data,layouts,static,themes}
Watching for config changes in /Users/user/Workspace/technical-blog/config.yaml, /Users/user/Workspace/technical-blog/themes/hugo-theme-stack/config.yaml
Environment: "development"
Serving pages from memory
Running in Fast Render Mode. For full rebuilds on change: hugo server --disableFastRender
Web Server is available at http://localhost:1313/ (bind address 127.0.0.1)
Press Ctrl+C to stop

Build된 결과를 보기 위해 http://localhost:1313 으로 접속했을때 페이지가 보인다면, 여기까지는 잘 진행되었다고 판단하시면 됩니다.

Git Repo 연결 및 ShellScipt 작성

Hugo로 만들어진 Project를 개인(Privarte) Repository에 등록하고, Hugo로 Build된 결과를 Github Page로 연동하는 작업입니다.
그 뒤로는 배포에 사용하기 위한 ShellScript에 대해 설명하겠습니다.

아래의 명령어들을 실행하면, 처음에 만들어둔 2개 Repository에 용도에 맞게 사용하게 됩니다.

 1
 2
 3
 4
 5
 6
 7
 8
 9
10
11
# 현재 위치 확인
$ pwd
/Users/user/Workspaces/blog

# blog -> blog 레포지토리 연결
# git remote add origin http://github.com/<username>/technical-blog.git
$ git remote add origin http://github.com/korcasus/technical-blog.git

# blog/public -> <username>.github.io 연결
# git submodule add -b master http://github.com/<username>/<username>.github.io.git public
$ git submodule add -b master http://github.com/korcasus/korcasus.github.io.git public

발행할 Contents를 작성을 완료한 후, Hugo로 Build해주는 과정이 필요로 합니다.
Build된 결과물은 public 디렉토리에 생성됩니다. 이를 Github Page에 반영해주는 과정이 필요로 합니다.
매번 따로 수행하기보다는 배포 스크립트로 만들어 실행하는것이 운영하기 쉽습니다.

저의 경우에는 아래의 스크립트를 통해, 배포를 합니다. (Reference)

 1
 2
 3
 4
 5
 6
 7
 8
 9
10
11
12
13
14
15
16
17
18
19
20
21
22
23
24
25
26
27
28
29
30
31
32
33
34
35
36
#!/bin/bash

echo -e "\033[0;32mDeploying updates to GitHub...\033[0m"

# Build the project.
# hugo -t <여러분의 테마>
hugo -t hugo-tranquilpeak-theme

# Go To Public folder, sub module commit
cd public
# Add changes to git.
git add .

# Commit changes.
msg="rebuilding site `date`"
if [ $# -eq 1 ]
  then msg="$1"
fi
git commit -m "$msg"

# Push source and build repos.
git push origin master

# Come Back up to the Project Root
cd ..

# blog 저장소 Commit & Push
git add .

msg="rebuilding site `date`"
if [ $# -eq 1 ]
  then msg="$1"
fi
git commit -m "$msg"

git push origin master
1
2
3
4
5
# deploy.sh 실행 파일 권한 부여
$ chmod 777 deploy.sh

# 배포 실행
$ ./deploy.sh

Post 작성

발행할 글을 작성할때 아래처럼 명령어를 입력하면 Hugo에서 Markdown을 생성해줍니다.

 1
 2
 3
 4
 5
 6
 7
 8
 9
10
11
12
$ cd $project

# hugo new ${content내 directory}/${사용할 파일명}.md
$ hugo new post/hugo-blog-2/index.md
Content "/Users/user/Workspace/technical-blog/content/post/hugo-blog-2/index.md" created

$ cat content/post/hugo-blog-2/index.md
---
title: "Hugo Blog 2"
date: 2022-11-14T23:58:09+09:00
draft: true
---

주의해야할 점이 2가지 있습니다.

  1. content directory내에 생성된다는 점입니다.
  2. 확장자를 md로 해야합니다.

첫번째는 생성되는 경로를 정확히 파악하기 위해 주의해주는 것이 좋습니다.
두번째는 확장자를 md로 하지않을 경우, 명령어로 post생성할때 에러가 발생합니다.

Hugo에서 archetypes 디렉토리를 포함하고있는데, default.md 파일이 존재합니다.
명령어를 통해 확장자 md파일을 만들때, 기본값으로 사용됩니다.
하지만 여기에 포함되지않은 확장자 파일을 만들경우, 기본값으로 사용할 파일이 존재하지않으므로 에러가 발생합니다. default.md 파일을 확인해보면 아래와 같습니다.

1
2
3
4
5
---
title: "{{ replace .Name "-" " " | title }}"
date: {{ .Date }}
draft: true
---

Utterences(Github 댓글 위젯) 연동

Stack 테마에서는 아래와 같은 댓글 시스템들을 지원합니다. (참고)

  • Cactus
  • Cusdis
  • Disqus
  • DisqusJS
  • Giscus
  • Gitalk
  • Remark42
  • Twikoo
  • utterances
  • Vssue
  • Waline

이 중에 OpenSource이고, github과 연동하여 쉽게 사용가능한 Utterences를 사용합니다.
사용하기 위해서는 별도의 Repository가 추가로 필요합니다. 여기서 사용한 Repo이름은 blog-comments 입니다.
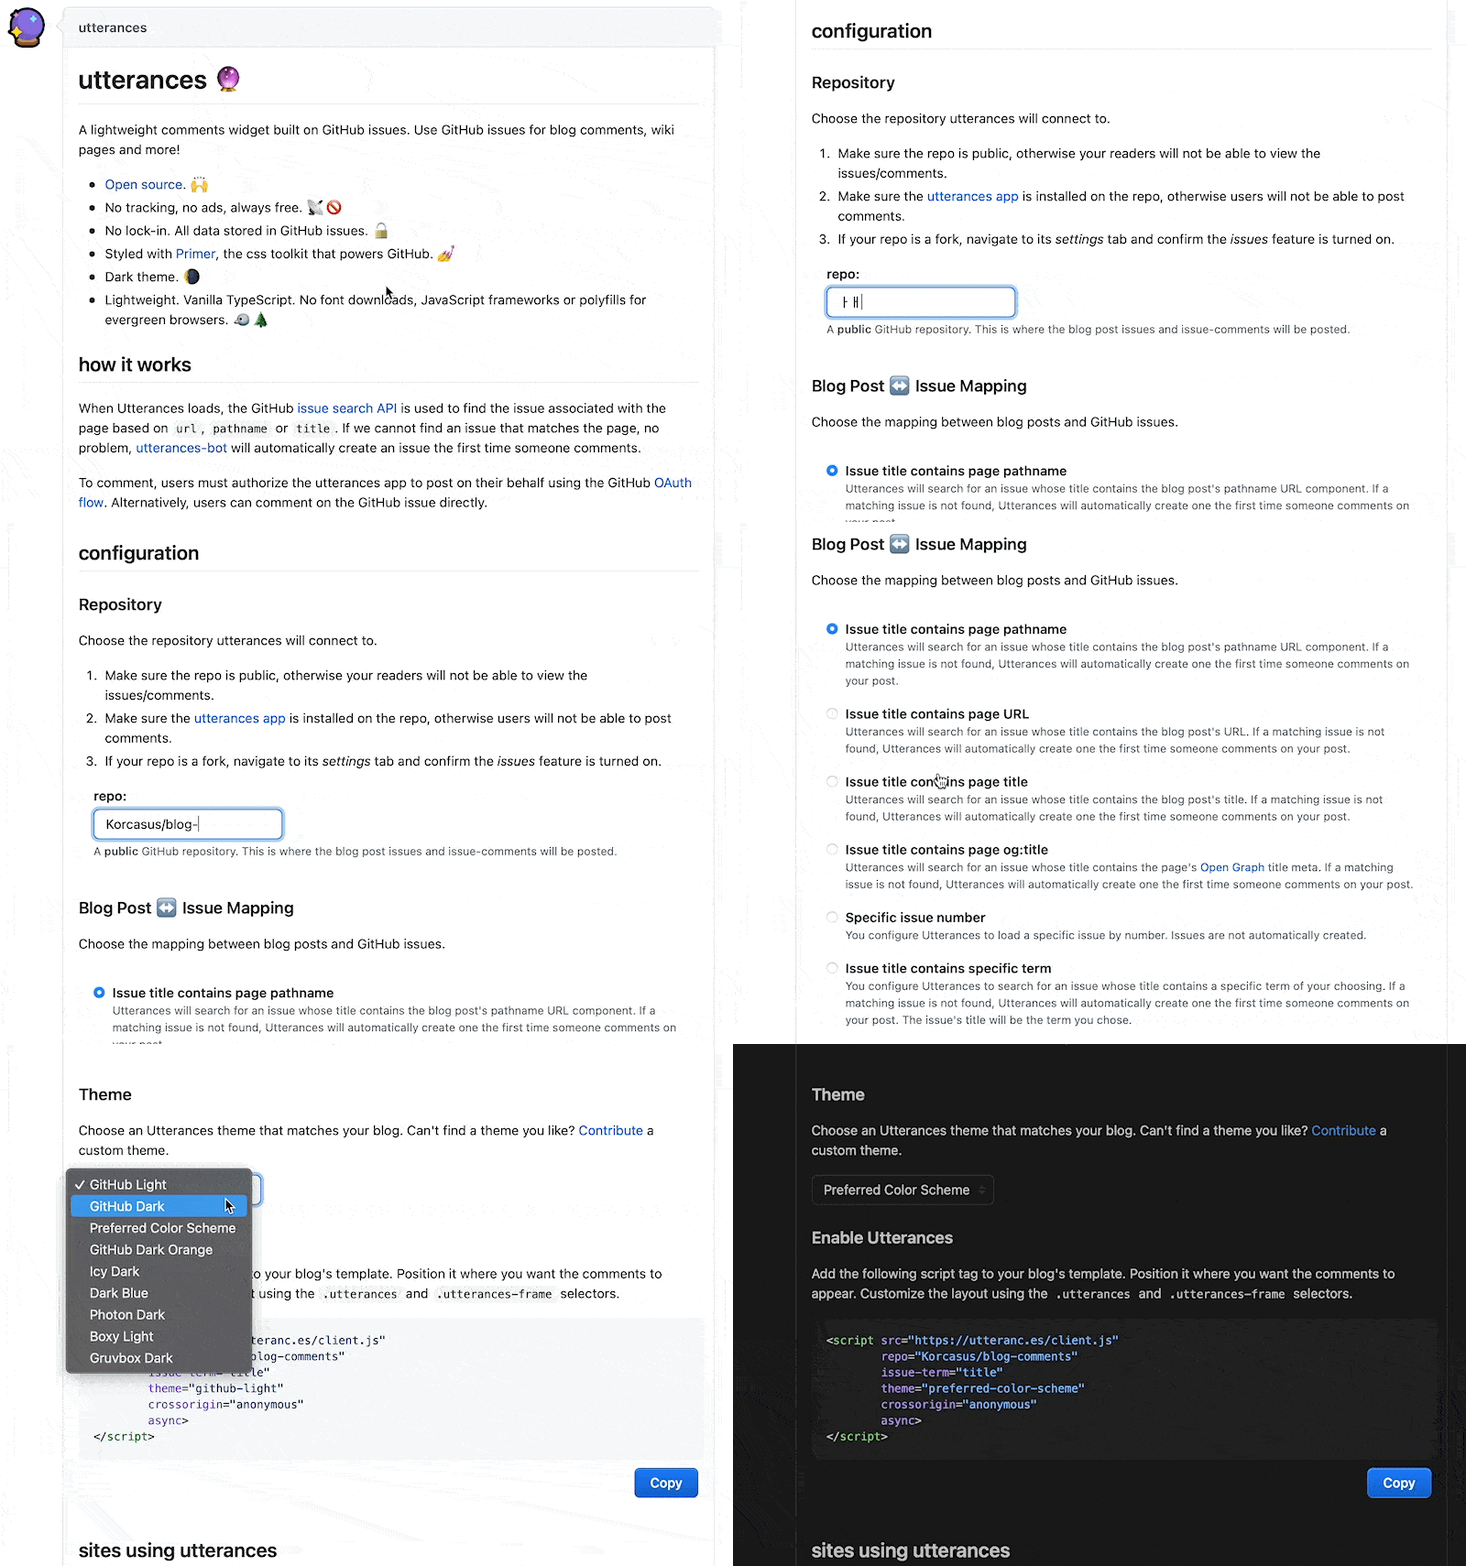
comment

첨부한 GIF대로 진행하시면 됩니다. 잊지말고 utterances app연동 진행해주세요!
Blog Post와 Issue Mapping 방식을 다르게 하고싶다면, 선호하시는 것으로 선택하시면 됩니다. 만들어진 Script를 테마에 적용해보도록 하겠습니다.

blog/themes/${테마}/layouts/partials/comments/provider 경로에 사용하고자 하는 댓글 시스템에 직접 수정방법도 있습니다.
하지만 이는 추후 테마 업데이트 하는데 문제가 발생할 수 있으므로 제외합니다.

테마에서 제공하는 config.yaml를 수정해서 댓글 시스템에 적용해보겠습니다.
프로젝트 루트 디렉토리에 복사해둔 config.yaml을 사용합니다. 아래처럼 comments를 사용할건지, 사용할 provider를 지정해줄 수 있습니다.

 1
 2
 3
 4
 5
 6
 7
 8
 9
10
11
12
13
14
15
16
params:
  comments:
    enabled: true
    provider: disqus

    disqusjs:
      shortname:
      apiUrl:
      apiKey:
      admin:
      adminLabel:

    utterances:
      repo:
      issueTerm: pathname
      label:

추출한 Script를 적용하면 아래처럼 됩니다.
만약 Issue Mapping을 설명한 방법과 다르게 하셨다면 blog/themes/${테마}/layouts/partials/comments/provider/utterances.html 를 확인해서 Script에 맞게끔 값을 입력해주세요.

1
2
3
4
5
6
7
params:
  comments:
    enabled: true
    provider: utterances
    utterances:
      repo: Korcasus/blog-comments
      issueTerm: title

정상적으로 만들어졌다면 게시글 하단에 아래와 같이 추가되어있는것을 보실 수 있습니다.
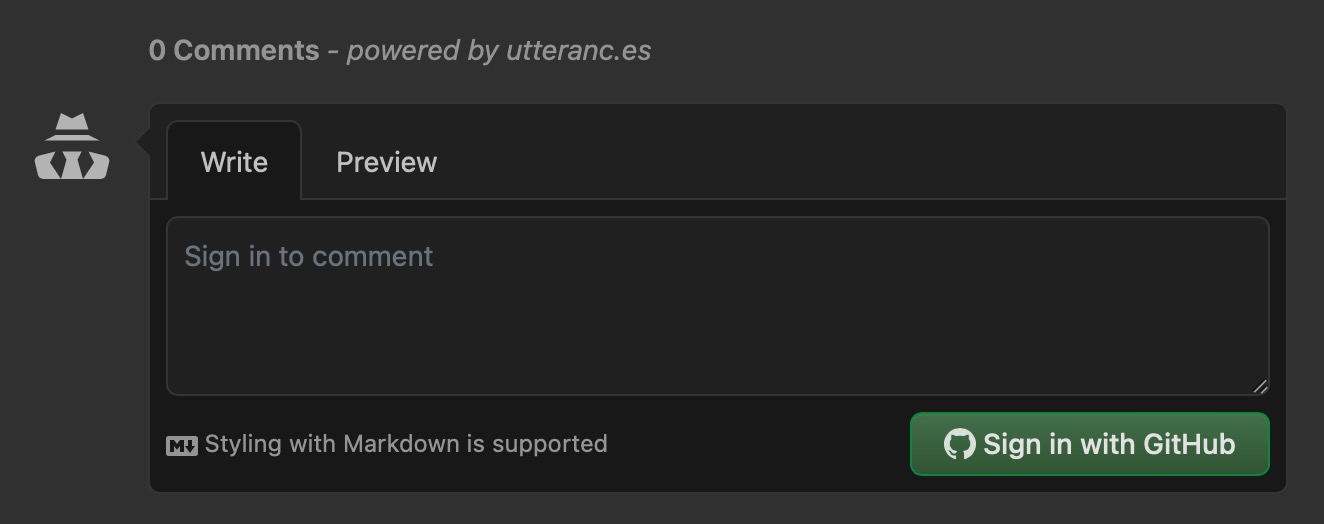
comment_apply

댓글이 잘 작성되는지 확인해보겠습니다.
로그인후 테스트 댓글을 작성해보았습니다.
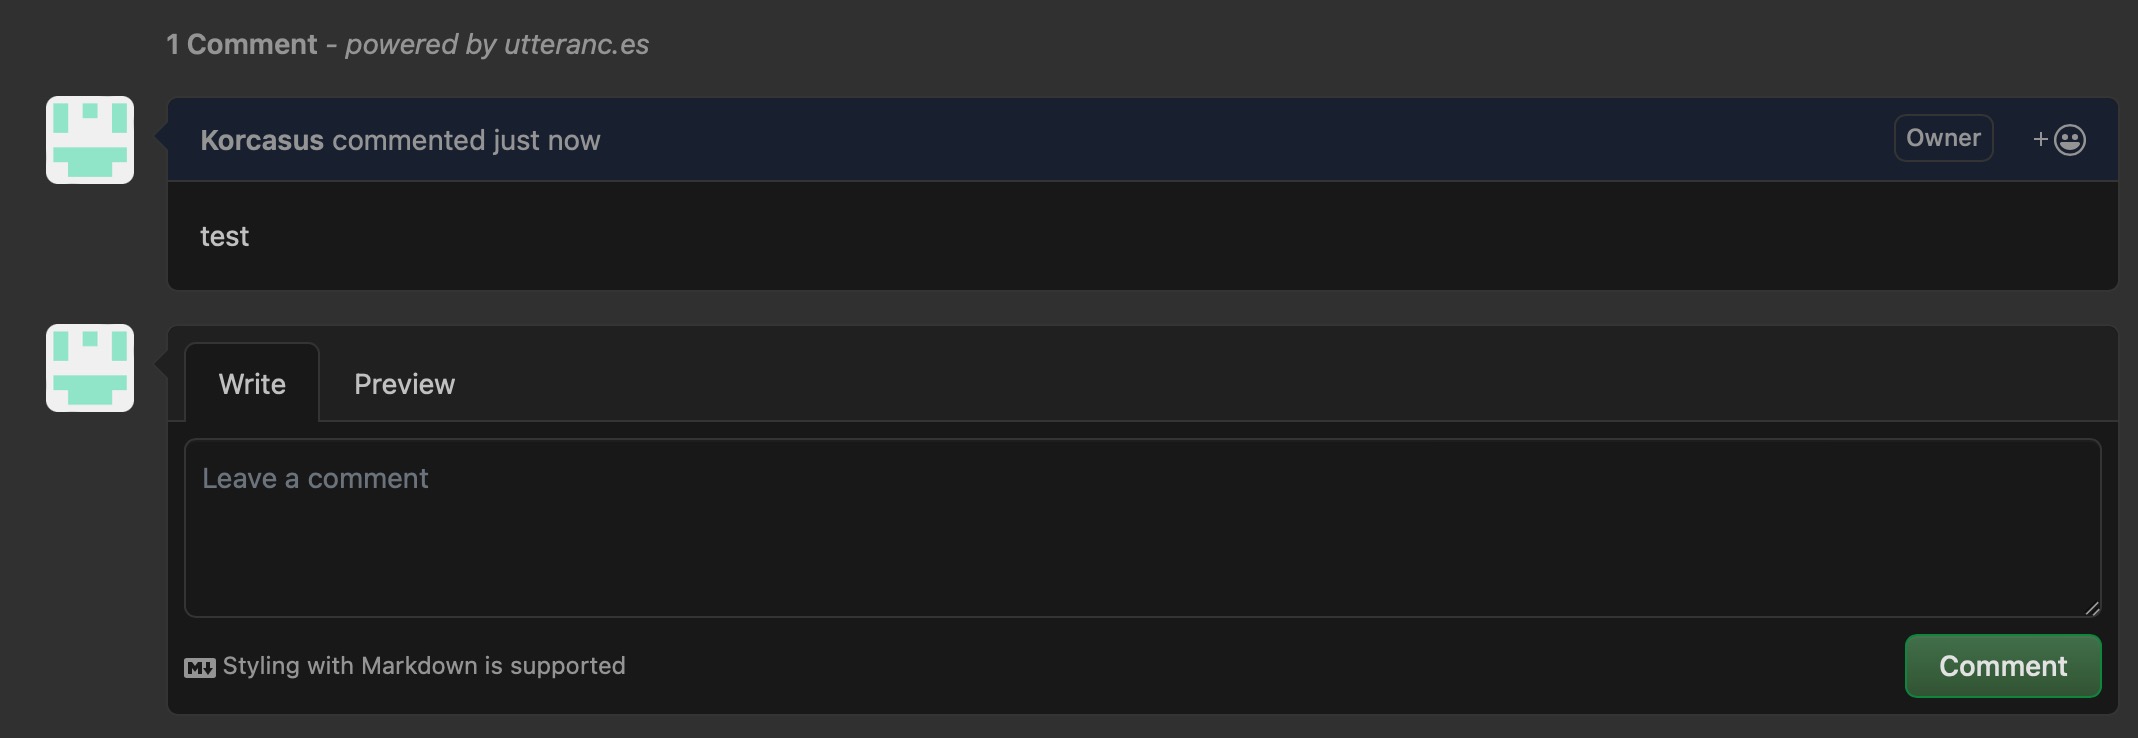
comment_test

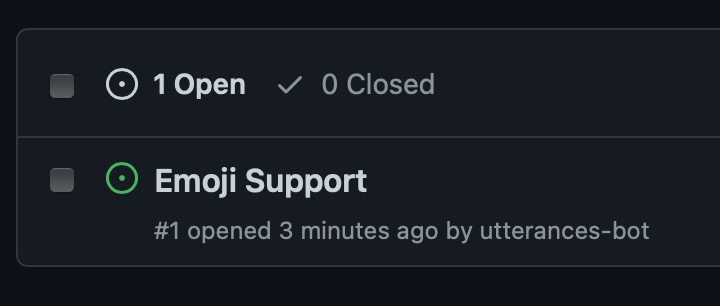
작성된 댓글이 Github Issue로 잘 등록되었습니다.
comment_in_issue

정리

여기까지 Hugo로 Static Site Generate, 테마적용, 댓글 시스템 연동까지 진행해보았습니다.
다음에는 만든 블로그를 고도화(Custom 방법, 구글 검색노출, 구글 analytics) 해보겠습니다.
감사합니다.

Licensed under CC BY-NC-SA 4.0
Hugo로 만듦
JimmyStack 테마 사용 중